
The demo will show you how to use the features Microprofile JWT specification implemented on TomEE.
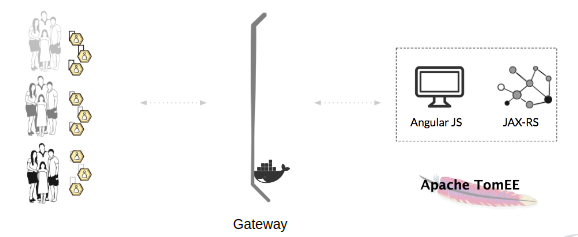
The diagram below shows the clients on the left side, in the middle the Tribestream API Gateway (TAG) as the authorization server running on docker and on the right, a movie application built using AngularJS for the front-end and JAX-RS for the back-end.
To start TAG execute the following command for Linux:
docker run --net="host" --rm -it --name tag -e LICENSE=accept -e CASSANDRA_EMBEDDED=true -p 8080:8080 tomitribe/tribestream-api-gateway:latestFor OSX or Windows:
docker run --rm -it --name tag -e LICENSE=accept -e CASSANDRA_EMBEDDED=true -p 8080:8080 tomitribe/tribestream-api-gateway:latestTAG is ready when you see the following message in the logs:
INFO [main] org.apache.coyote.AbstractProtocol.start Starting ProtocolHandler ["http-bio-8080"]
INFO [main] org.apache.coyote.AbstractProtocol.start Starting ProtocolHandler ["ajp-bio-8009"]
INFO [main] org.apache.catalina.startup.Catalina.start Server startup in 18348 msAfter running the gateway, let’s pull the demo application. Execute the following command to pull the project from Github:
git clone https://github.com/tomitribe/microservice-with-jwt-and-microprofile.gitThen go to the project folder.
Let’s execute a script to load the initial OAuth2 configuration and also all the credentials needed for the demo.
./src/main/scripts/load-configuration.shNow start TomEE so our app is up and running. In the project root folder execute:
mvn clean install -DskipTests tomee:runApplication will be running when you see the following message in the logs:
30-Jul-2018 19:17:44.315 INFO [main] sun.reflect.NativeMethodAccessorImpl.invoke Starting ProtocolHandler ["http-nio-8181"]
30-Jul-2018 19:17:44.328 INFO [main] sun.reflect.NativeMethodAccessorImpl.invoke Starting ProtocolHandler ["ajp-nio-8009"]
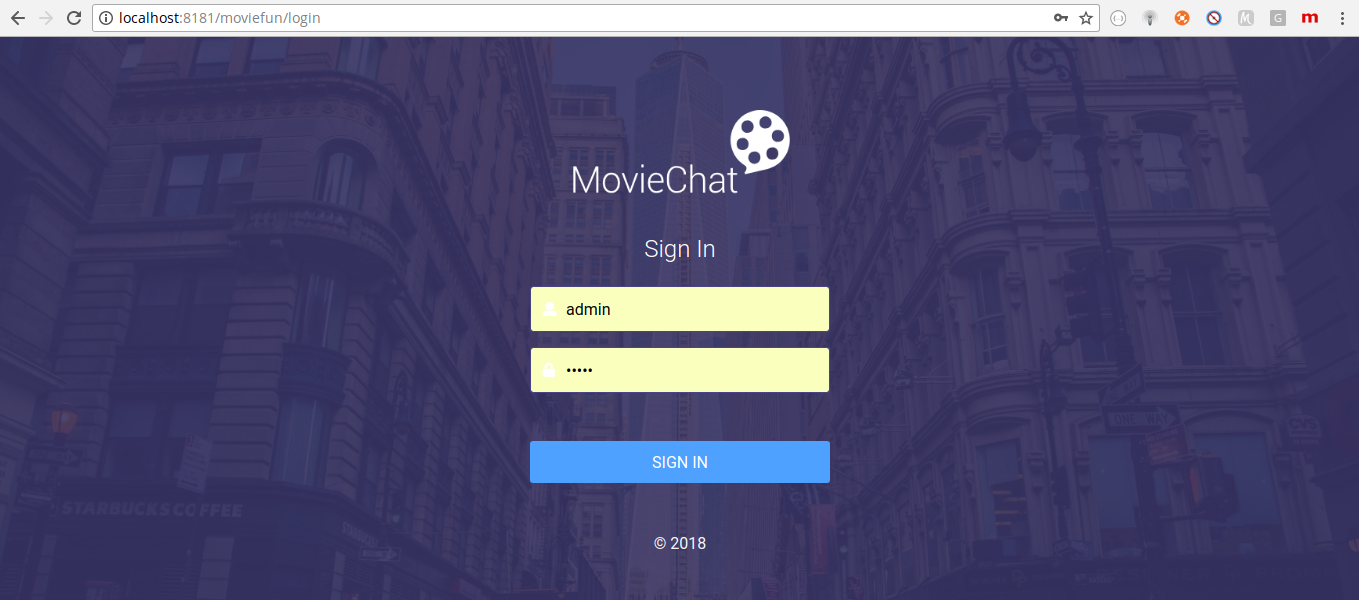
30-Jul-2018 19:17:44.336 INFO [main] sun.reflect.NativeMethodAccessorImpl.invoke Server startup in 3457 msAfter that you can go to the browser and open http://localhost:8181/moviefun/login. You will be able to see the login page:
Next step is to go through a scenario in the user side of things to understand how permission works.
Login the application with:
username: alex
password: password
Load sample data on "Click here to load sample data". Then click on the ellipses (…) on the first item on the list of movies and Edit.
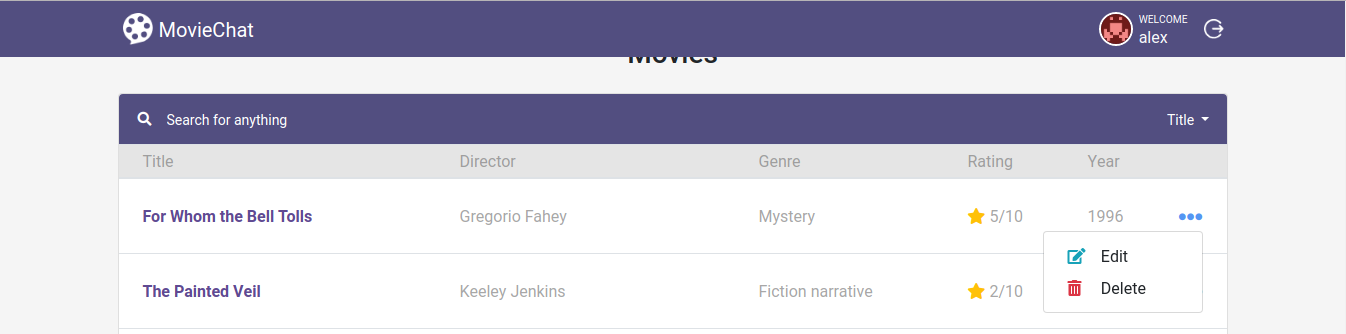
Change a field like Title and Save. You will see that user alex has the permission to edit a movie.
You will also be able to add a movie clicking on Add movie or to delete a movie in the ellipses button as well.
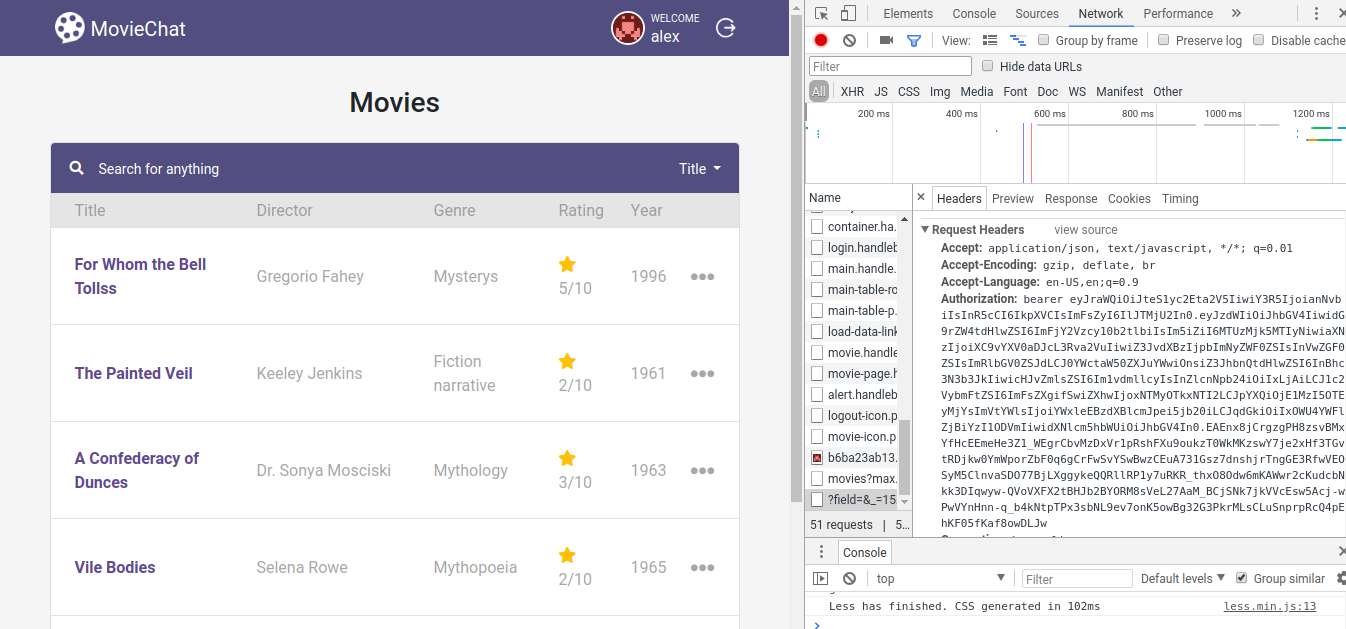
All the operations are possible because the application has a jwt access token token that was granted in the login by the gateway and it can be used to access all the services in the back-end until it expires.
In your browser go to the Developer Tools (F12), refresh the page, then inspect the request and look for the Authorization header. It will have the access token right after the bearer prefix.
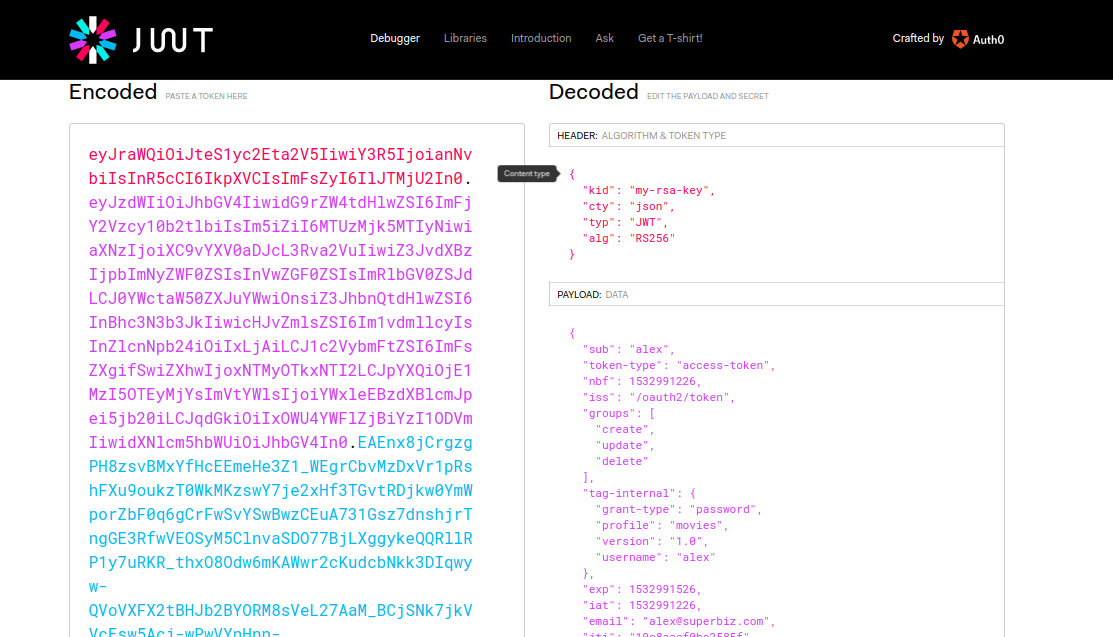
Copy the JWT from the Authorization header and paste it on https://jwt.io. It will decode the JWT and show you everything that is stored inside the token. Note that the user alex has the permissions to create, update and delete in the groups field.
Now login with another user:
username: john
password: password
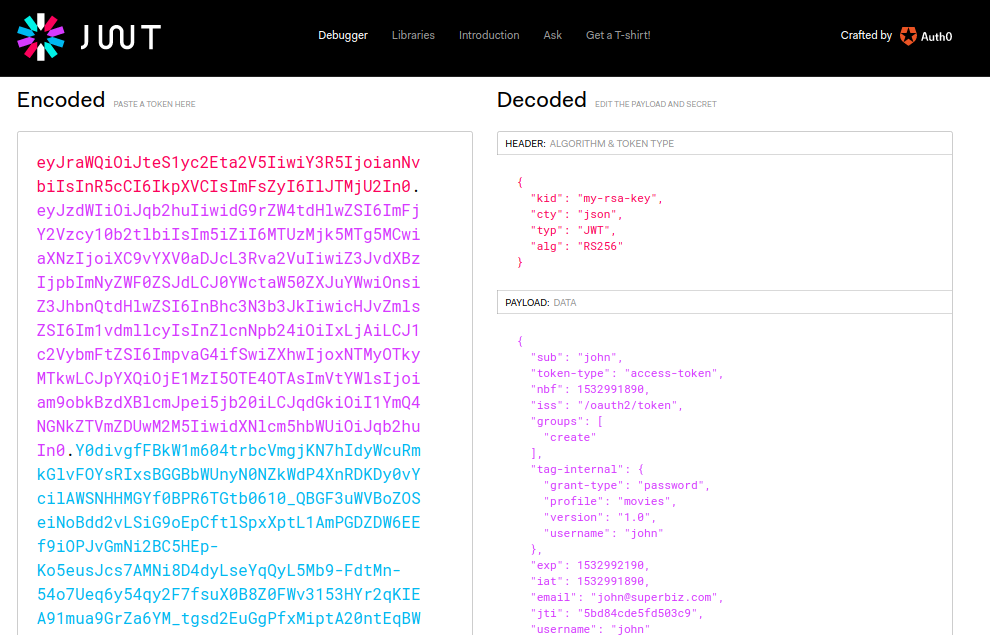
If you inspect again the request and check the token in jwt.io you will see that john only has permission to create a movie. See the groups field in the image below:
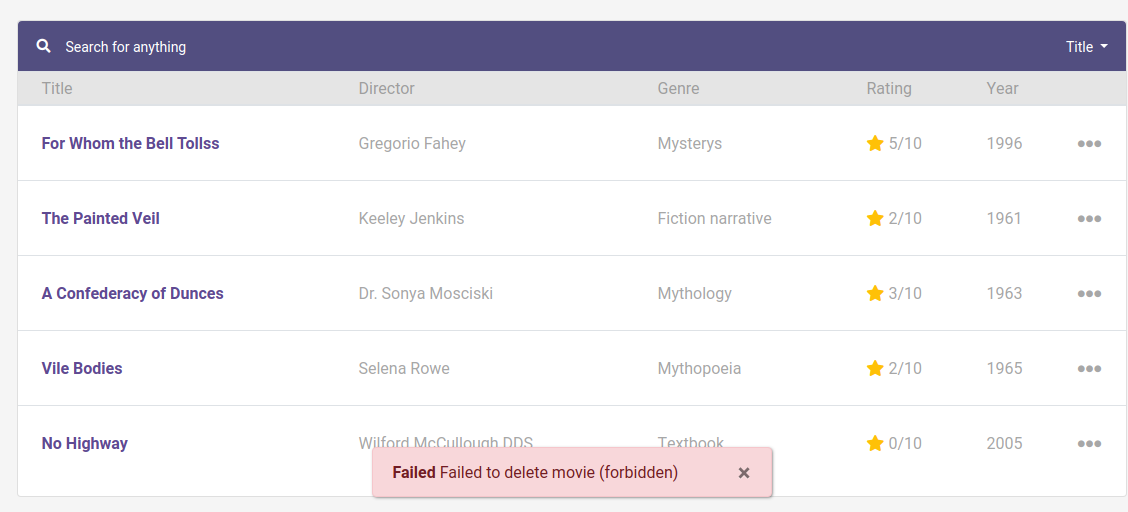
If you try to delete a movie, clicking ellipses (…) then Delete in one of the movies, you will get a forbidden message.
Let’s now jump into the code and see how it works in the development side of things.
The first thing we need to configure is the Public Key.
The tokens coming from the gateway are signed with a private key and in order to verify if the token is valid in the back-end we need to have the public key configured. The class MoviesMPJWTConfigurationProvider has the configuration, it loads the publicKey.pem from the src/main/resources folder, see the code below:
@Produces
Optional<JWTAuthContextInfo> getOptionalContextInfo() throws Exception {
    JWTAuthContextInfo contextInfo = new JWTAuthContextInfo();

    contextInfo.setIssuedBy(ISSUED_BY);

    byte[] encodedBytes = TokenUtil.readPublicKey("/publicKey.pem").getEncoded();

    final X509EncodedKeySpec spec = new X509EncodedKeySpec(encodedBytes);
    final KeyFactory kf = KeyFactory.getInstance("RSA");
    final RSAPublicKey pk = (RSAPublicKey) kf.generatePublic(spec);

    contextInfo.setSignerKey(pk);
    contextInfo.setExpGracePeriodSecs(10);

    return Optional.of(contextInfo);
}
Note that the ISSUE_BY constant is very important as it will check the source of the token and put the type of key you are using, for example RSA.
Next step is to enable the application to use Microprofile JWT. The class ApplicationConfig will show you an example on how you can do that. All you have to do is to add the @LoginConfig annotation with the _authMethod="MP-JWT" to the JAX-RS Application class just like the code below:
@ApplicationPath("/rest")
@LoginConfig(authMethod = "MP-JWT")
public class ApplicationConfig extends Application {
    // let the server discover the endpoints
}Let’s now understand how we can manage the token inside the application. Open the MoviesResource. You will find a piece of code to handle the injection of the JSonWebToken.
@Inject
private JsonWebToken jwtPrincipal;
If you open the JsonWebToken class, you will see an interface with methods that give you access to the raw token and also to all the standard and custom claims.
public interface JsonWebToken extends Principal {

    String getName();

    default String getRawToken() {
        return getClaim(Claims.raw_token.name());
    }

    default String getIssuer() {
        return getClaim(Claims.iss.name());
    }

    default Set<String> getAudience() {
        return getClaim(Claims.aud.name());
    }

    default String getSubject() {
        return getClaim(Claims.sub.name());
    }

    default String getTokenID() {
        return getClaim(Claims.jti.name());
    }

    default long getExpirationTime() {
        return getClaim(Claims.exp.name());
    }

    default long getIssuedAtTime() {
        return getClaim(Claims.iat.name());
    }

    default Set<String> getGroups() {
        return getClaim(Claims.groups.name());
    }

    Set<String> getClaimNames();

    default boolean containsClaim(String claimName) {
        return claim(claimName).isPresent();
    }

    <T> T getClaim(String claimName);

    default <T> Optional<T> claim(String claimName) {
        return Optional.ofNullable(getClaim(claimName));
    }
}
For you to understand it better, every call on the MoviesResource goes through the method toIdentityString(), the goal of this method is to log some of the claims in the token.
private String toIdentityString() {
  if (jwtPrincipal == null) {
      return "no authenticated user.";
  }

  final StringBuilder builder = new StringBuilder();

  builder.append(username);
  builder.append(String.format(" (jti=%s)", jti));
  builder.append(String.format(" (email=%s)", email));
  builder.append(String.format(" (person creditCard=%s)", person.getCreditCard()));
  builder.append(String.format(" (creditCard=%s)", creditCard));
  builder.append(String.format(" (language=%s)", person.getLanguage()));
  builder.append(String.format(" (groups=%s)", StringUtils.join(jwtPrincipal.getGroups(), ", ")));
  return builder.toString();
}
The result of you clicking on a movie will be something like this in the logs:
30-Jul-2018 21:17:13.618 INFO [http-nio-8181-exec-8] org.superbiz.moviefun.rest.MoviesResource.find find: ClaimValueWrapper{name='username', value=alex} (jti=ClaimValueWrapper{name='jti', value=497f9c60e7feca62}) (email=ClaimValueWrapper{name='email', [email protected]}) (person creditCard=3211 1922 4433 1111) (language=SPANISH) (groups=create, update, delete)The Microprofile JWT also gives you a way to inject the claims directly in the resource.
@Inject
@Claim("username")
private ClaimValue<String> username;

@Inject
@Claim("email")
private ClaimValue<String> email;

@Inject
@Claim("jti")
private ClaimValue<String> jti;In the MoviesResource you will also find the JAX-RS class SecurityContext. You can inject the class like this:
@Context
private SecurityContext securityContext;
It has a method called isUserInRole(String) that can be used to validate if a user has a role to perform certain action. This method will check if the String passed is in the groups claim from the JWT. The example below shows that the addMovie can only be successful if user has create in the groups claim:
@POST
@Consumes("application/json")
public Movie addMovie(Movie movie) {
    LOGGER.info("add: " + toIdentityString());
    if (!securityContext.isUserInRole("create")) {
        throw new WebApplicationException("Bad permission.", Response.Status.FORBIDDEN);
    }
    service.addMovie(movie);
    return movie;
}
Another way to do this validation is to use the @RolesAllowed annotation. Just like the previous example it will check for the groups claim in the JWT to validate if you can or cannot perform an action. For this example if the claim groups does not have update, it cannot update the movie.
@PUT
@Path("{id}")
@Consumes("application/json")
@RolesAllowed("update")
public Movie editMovie(
       @PathParam("id") final long id,
       Movie movie) {
   LOGGER.info("edit: " + toIdentityString());
   service.editMovie(movie);
   return movie;
}Now that we learned the basics, let’s go fancy and extend it a little more and do some refactoring to improve them. For injecting the claim username, for example, you added it using ClaimValue<String> directly in the MoviesResource. ClaimValue was required because the MoviesResource is @ApplicationScoped and in order be able to inject the value in the application scope, the implementation requires it to use ClaimValue.
But there is another way we could solve this problem. Let’s create a @RequestScoped class called Person and have all the fields injected directly using String without the ClaimValue class.
@RequestScoped
public class Person {

    @Inject
    @Claim("username")
    private String username;

    @Inject
    @Claim("email")
    private String email;

    @Inject
    @Claim("language")
    private String language;

    @Inject
    @DecryptedValue("creditCard")
    private String creditCard;

    @Inject
    @Claim("preferredGenre")
    private String preferredGenre;

    public Person() {
    }

    public String getUsername() {
        return username;
    }

    public String getEmail() {
        return email;
    }

    public String getCreditCard() {
        return creditCard;
    }

    public String getPreferredGenre() {
        return preferredGenre;
    }

    public String getLanguage() {
        return language;
    }
}
After that all you have to do is to inject in the MoviesResource and use it.
@Inject
private Person person;
If you wonder how the claims are being configured in the gateway you can login into TAG http://localhost:8080/tag/dashboard using username admin and password admin.
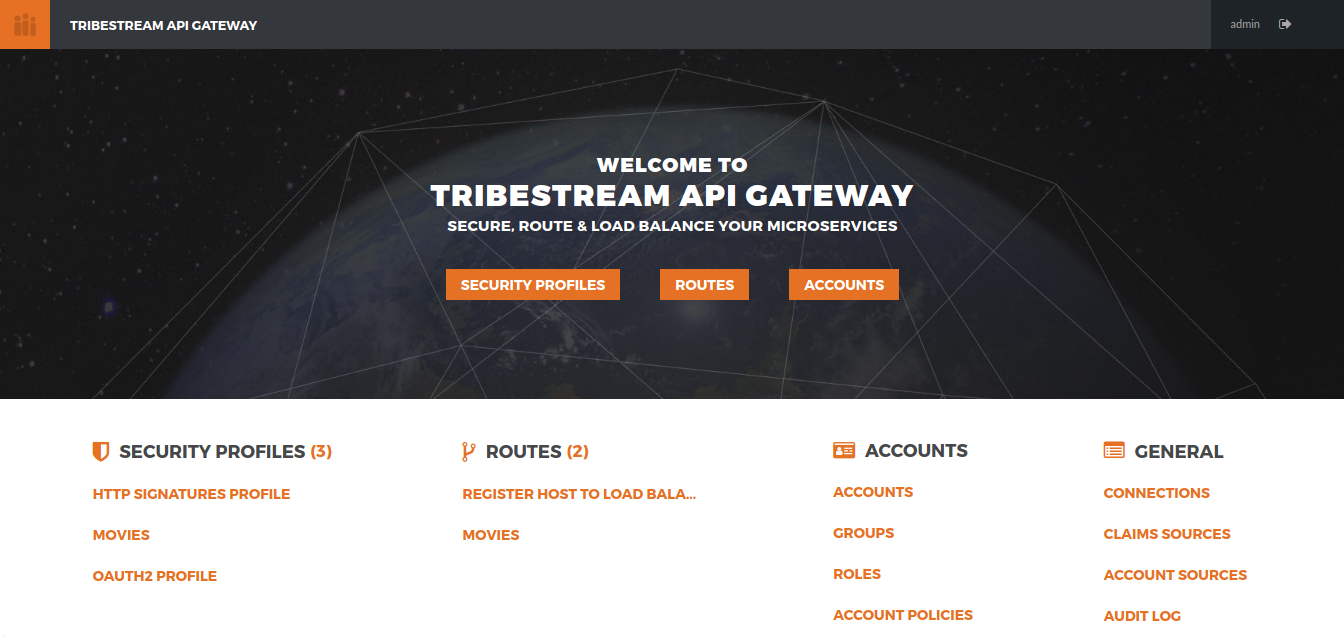
Then click Security Profiles and Movies. This is the place where we configure all the OAuth2 settings in TAG. If you scroll down to the bottom you can see all the claims configured.
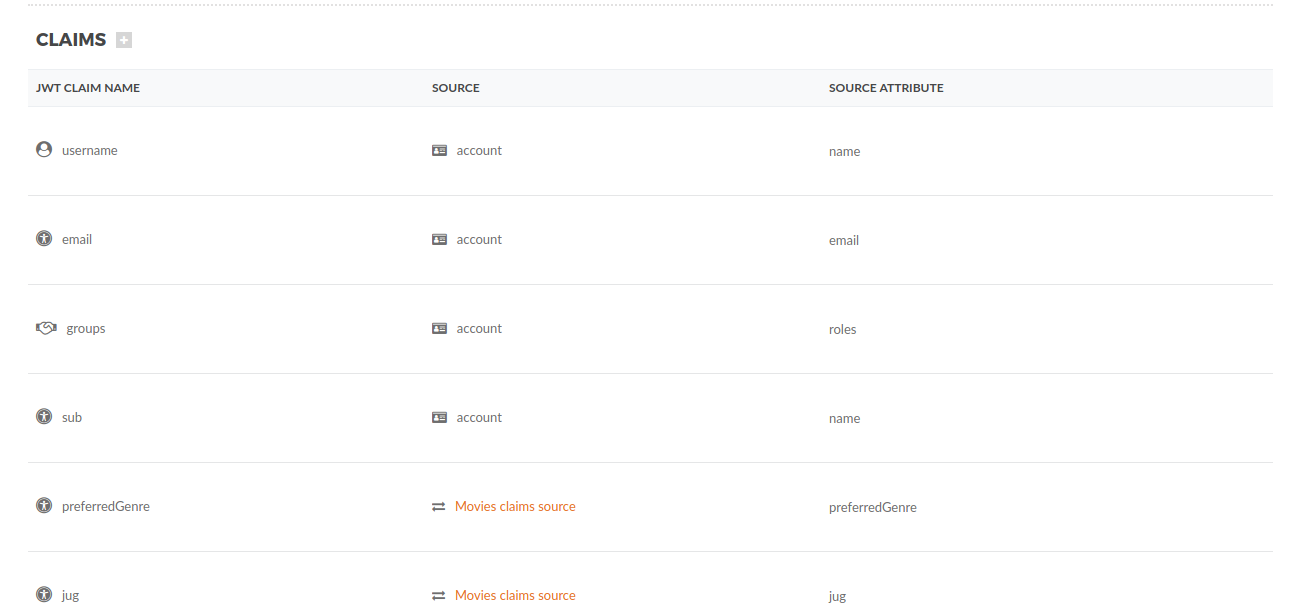
The claims come from an account configured in the gateway or from an external microservice configured in TAG as an API Claim Source. Basically the gateway will call the MoviesClaimSourceResource microservice and pull more claims for a specific user.
{
    "preferredGenre": "Mystery",
    "language": "SPANISH",
    "creditCard": "6bWxxIgzb6gPHc9tMP99ef0hEaNnOIeA",
    "jug": "Guatemala JUG"
}
The claim to be in the JWT, it needs to be configured as a Claim in the previous page.
As you can see in the previous payload and in the JWT from alex, the creditCard is encrypted. This is a good practice, as anyone really can decode a base 64 encoded JWT, and you don’t want this information exposed in the network. If you want you can decrypt it and have it injected in your Person class. See the CipherProduces class below:
@RequestScoped
public class CipherProduces {

    @Inject
    private JsonWebToken jsonWebToken;

    @Produces
    @DecryptedValue
    public String decryptedCreditCard(InjectionPoint injectionPoint) {
        final DecryptedValue annotation = injectionPoint.getAnnotated().getAnnotation(DecryptedValue.class);
        final Optional<Object> claim = jsonWebToken.claim(annotation.value());
        if (claim.isPresent()) {
            return Cipher.INSTANCE.getPasswordCipher().decrypt(claim.get().toString().toCharArray());
        }
        return null;
    }
}
You will see a CDI @Produces method that will let you produce a decrypted value of an encrypted string. It will get the claim name from the @DecryptedValue annotation, check if the claim exists in the JsonWebToken, decrypt the claim using the TomEE cipher and return it to be injected. This is the way it should be injected in the Person class.
@Inject
@DecryptedValue("creditCard")
private String creditCard;