
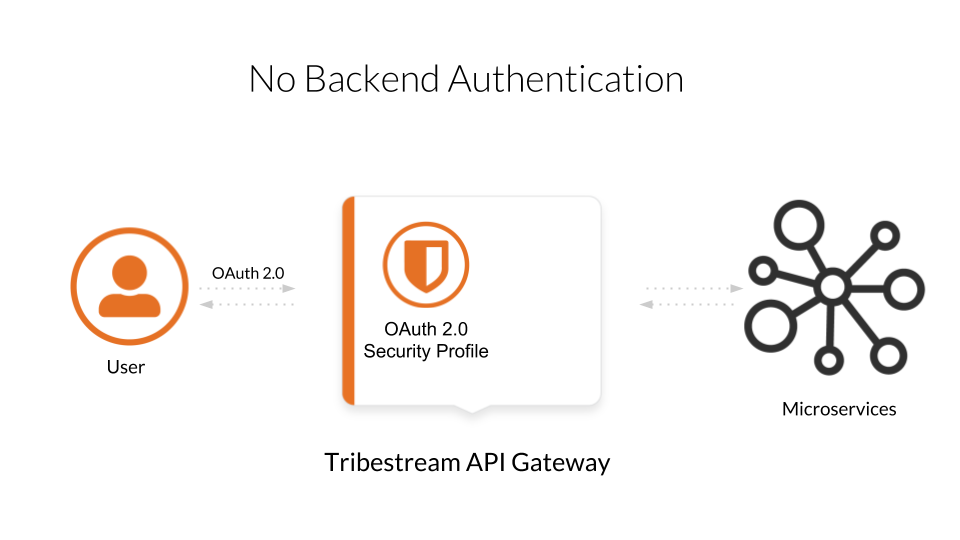
We have one important requirement: All HTTP requests must be authenticated.
This means the HTTP requests for both the frontend users and the backend services will be authenticated.
We are using 2 backend services to demonstrate how the calls between them should be setup.
A significant number of organizations simply assume the intranet where the backend services are running is secure. With that in mind, they usually don’t require authentication between services. Services can call each other without limitations.
What if someone gains access to that intranet and is able to query all the REST APIs without limitations? There are a few famous data breaches that were performed by employees or contractors.
What about IP whitelisting? Someone from the outside, exploiting a vulnerability, can gain access to a trusted machine, leading also to data breaches.
In parallel to these attack vectors, as organizations grow, and you keep increasing the number of services and developer teams, you will want to keep an eye on how’s executing which services and why. You want to keep track on who’s generating more load and even disable a particular service.
In this guide we assume the organization isolates all the services. All requests must go trough the API gateway. There is merit in centralising credentials management. Imagine what you have an environment with 10 microservices and you add a new one used by half of them… You need to propagate your credentials through 5 different teams. The more people have access to the credentials, the higher the chance of a breach.
To each service, two sets of credentials will be given:
Inbound credentials for the received requests.
Outbound credentials for all requests that service needs to perform.
No one, apart from the TAG and a particular service, will know the credentials. If at some point a misbehaved microservice needs to be isolated by the support team, because it has a bug doing calls in a loop, you can immediately disable its credentials.
To wrap it up, we need backend authentication because:
The intranet is not that secure.
HTTP requests can only bee processed from authenticated sources.
We can revoke access to misbehaved microservices at any time.
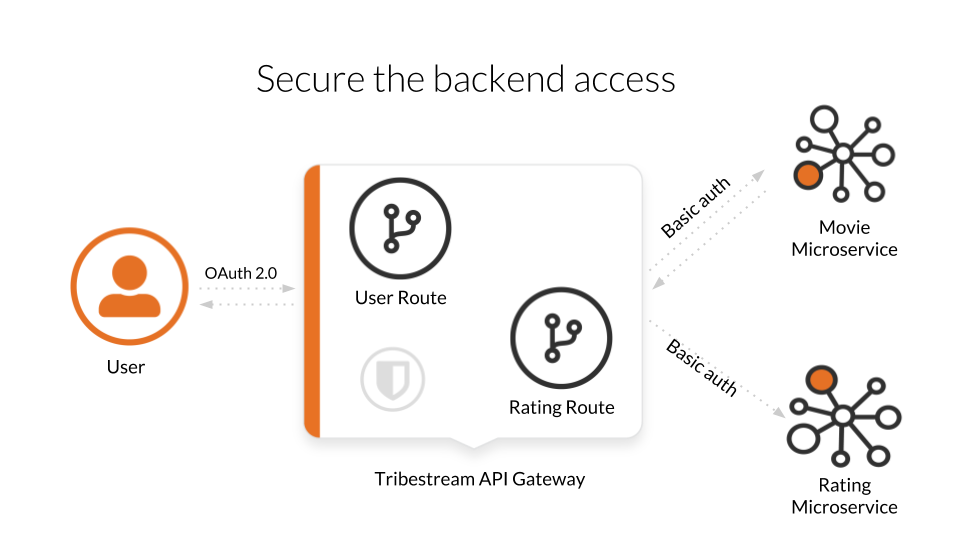
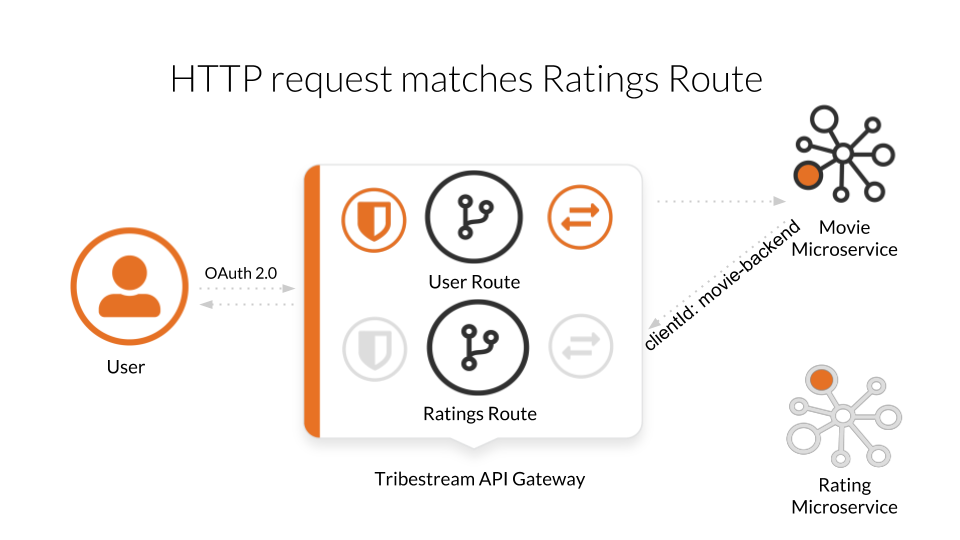
Remember the Movie application from previous guides? It turns out we were asked to split it… For some super clever reason we had to extract the ratings into a separated microservice.
Now we have the movie-back and the ratings-app microservices. The movie-back will need, from now on, to do an HTTP request to the ratings-app to know the rating of each movie.
Frontend users will still see it as movie and will need to use OAuth 2.0 authentication.
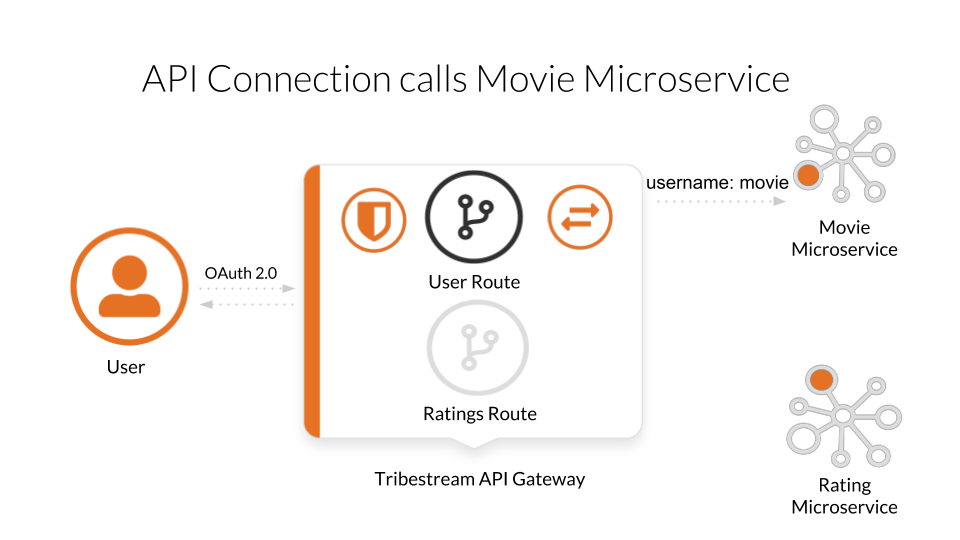
The requests are then forward to the movie-back microservice using Basic authentication. In order to call the ratings_app we also need to use Basic authentication, and remember, ony the TAG knows the credentials of all the microservices.
An additional architectural advantage of having the TAG, but we are not showing today is that the endpoints are normalised and resilient to changes. The endpoints of the microservices themselves can change without impacting who’s using them.
In this case we are using Basic authentication without HTTPS. Don’t do that in production.
Basic authentication cannot prevent replay attacks.
Ideally, the backed requests should be secured using HTTP Signatures. We are not doing in this guide to keep the client applications simpler. If you haven’t seen it yet, take a look at the HTTP Signatures guide.
We renamed the original movie-app to movie-back, for backend. Then we extracted the ratings logic into a new microservice having it’s own REST API, with one endpoint published at:
In order to do HTTP requests, we had to add a new library to the movie-back pom.xml file:
<dependency>
  <groupId>org.apache.cxf</groupId>
  <artifactId>cxf-rt-rs-client</artifactId>
  <version>3.1.13</version>
  <scope>provided</scope>
</dependency>
The requests are made in the MovieBean class:
//Instantiate the client:
private final String ratingsUser = System.getProperty("api.access.user");
private final String ratingsPassword = System.getProperty("api.access.password");

private final WebClient webClient = WebClient.create("http://localhost:8080", ratingsUser, ratingsPassword, null);

/**
 * Get the rating of a movie.
 *
 * @param id the movie ID
 * @return an int between 0 (avoid) to 10 (masterpiece)
 */
private int getRating(final long id) {
    return webClient.reset()
            .path(RATING_PATH, id)
            .get(Integer.class);
}
Because the microservices use TomEE, we can store the client credentials on the system.properties file at tomee/conf:
Both microservices use TomEE, for Basic auth we simply need to add a tomcat-users.xml file at tomee/conf:
To start the TAG, execute the following command according to your operating system:
We can reuse the TAG docker container we created from the Tribe quickstart guide. To start TAG execute the following command:
docker start tagIf this is the first time you run TAG, open a terminal execute the following command according to your operating system:
For linux:
docker run --net="host" -de LICENSE=accept --name tag tomitribe/tribestream-api-gatewayFor OsX:
docker run -de LICENSE=accept --name tag -p 8080:8080 tomitribe/tribestream-api-gatewayTo see the TAG starting process log you can execute the following command:
docker logs -f tagOpen a browser and navigate to: http://localhost:8080/tag
Login into the TAG dashboard using the following credentials:
username:admin
password:admin
In order to run our demo Microservice we need to open a terminal and execute the following command:
If we already have used the movie-back:
docker start movie-backFor the first time:
docker run -d --net="host" --name movie-back tomitribedev/movie-backWe can validate that our microservice is up and running by executing the following command:
curl -i http://localhost:9080/movie-back/api/moviesYou must get a 401 error for unouthorized.
In order to run our demo Microservice we need to open a terminal and execute the following command:
If we already have used the ratings-app:
docker start ratings-appFor the first time:
docker run -d -p 9070:9070 --name ratings-app tomitribedev/ratings-appWe can validate that our microservice is up and running by executing the following command:
curl -i http://localhost:9070/rating-app/api/ratingsYou must get a 401 error for unouthorized.
We are going to add 2 user accounts, a client account, an OAuth 2.0 security profile, 2 API Connections and 2 routes to our microservices. Please checkout this github project:
git clone https://github.com/tomitribe/demo-secure-backend.gitChange to the demo-secure-backend folder:
cd demo-secure-backendAnd execute this script for Linux:
./setup_data_linux.shOr this one for OsX or Windows:
./setup_data_osx.shThe difference relates to how Docker sees the host computer network.
The base setup assumes you only had the old microservice on, hence, it only has the user’s OAuth profile, the route and its API connection to can the movie-back microservice:
Because we now have the rating-app, we need to:
Create the new routings-app API Connection
Use that API Connection in the new Ratings Route
Add a client secret to the movie-backend client account. This will allow the service make calls to the Ratings Route, which is protected with Basic auth
On the Dashboard, click connections. Then, in the menu, click add API Connection. The modal view will popup:
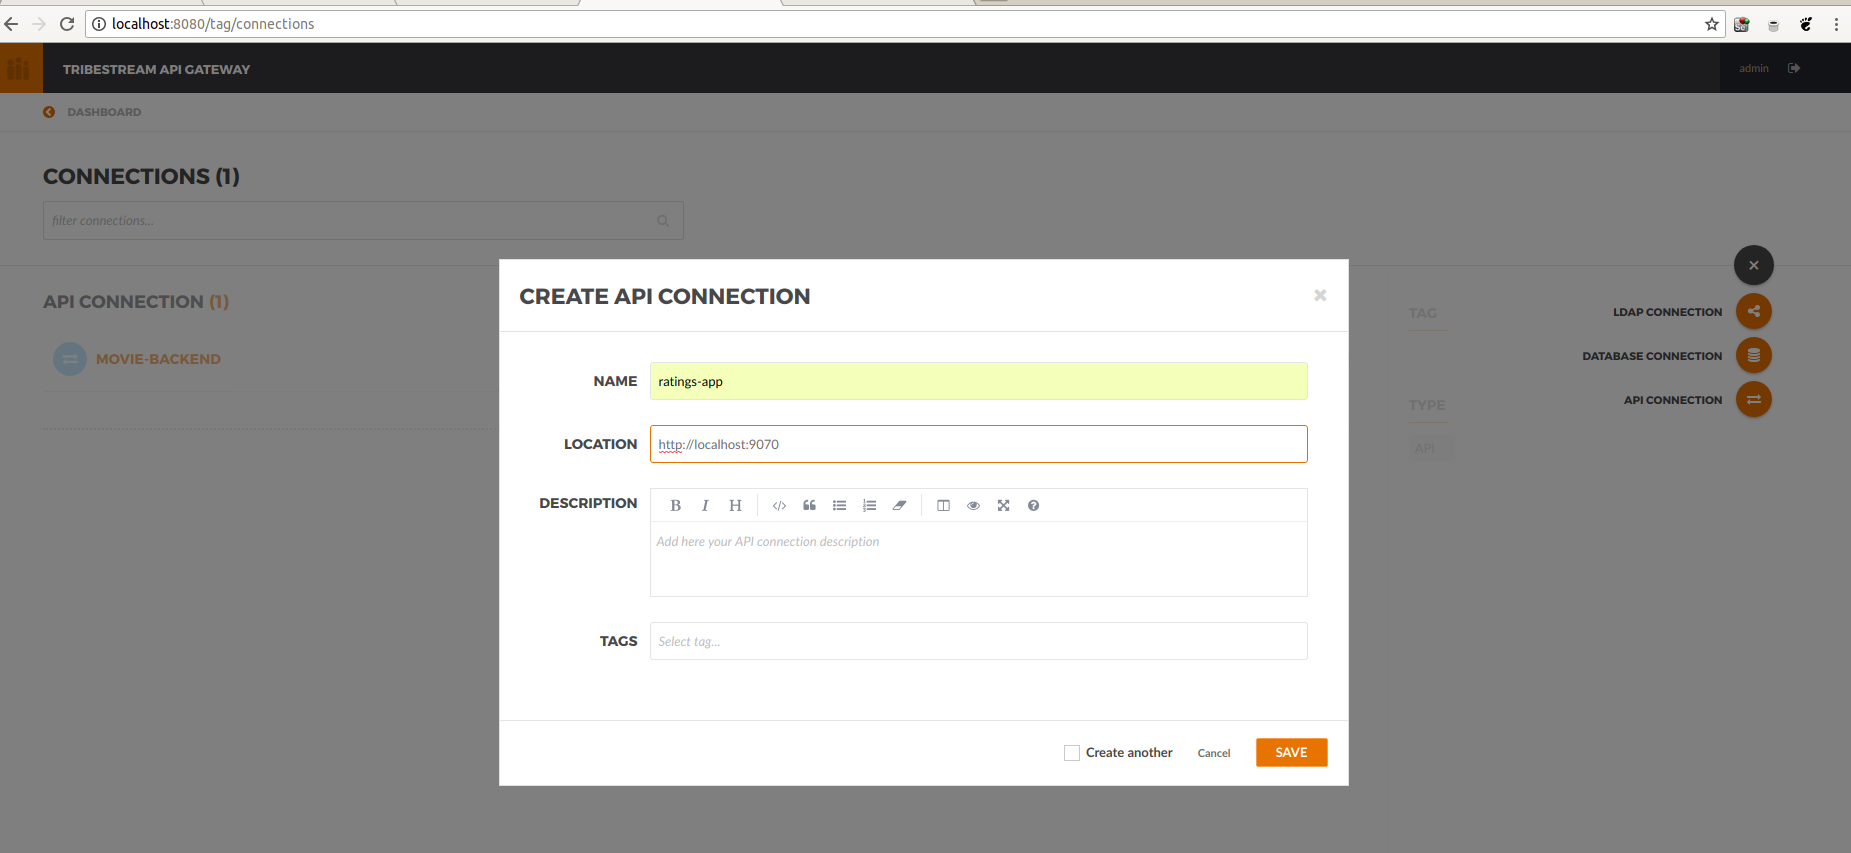
Because of how Docker works the location to insert is different for:
Linux: http://localhost:9070http://host.docker.internal:9070
After clicking Save, the details page will be shown and, in the menu, you can add the Basic auth authentication:
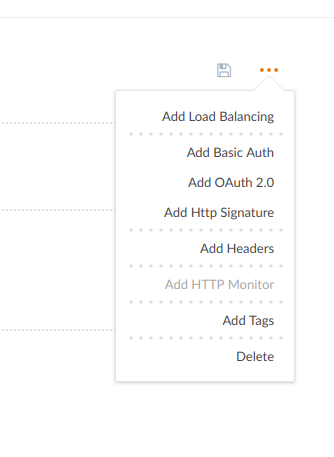
A new section will be shown and you can add the necessary credentials to call the ratings-app. They have to match what you put in the tomcat-users.xml of that app: username: rating; password: password.

On the Dashboard, click Routes. Then, in the menu, click add Mod_Rewrite Route. The modal view will popup:
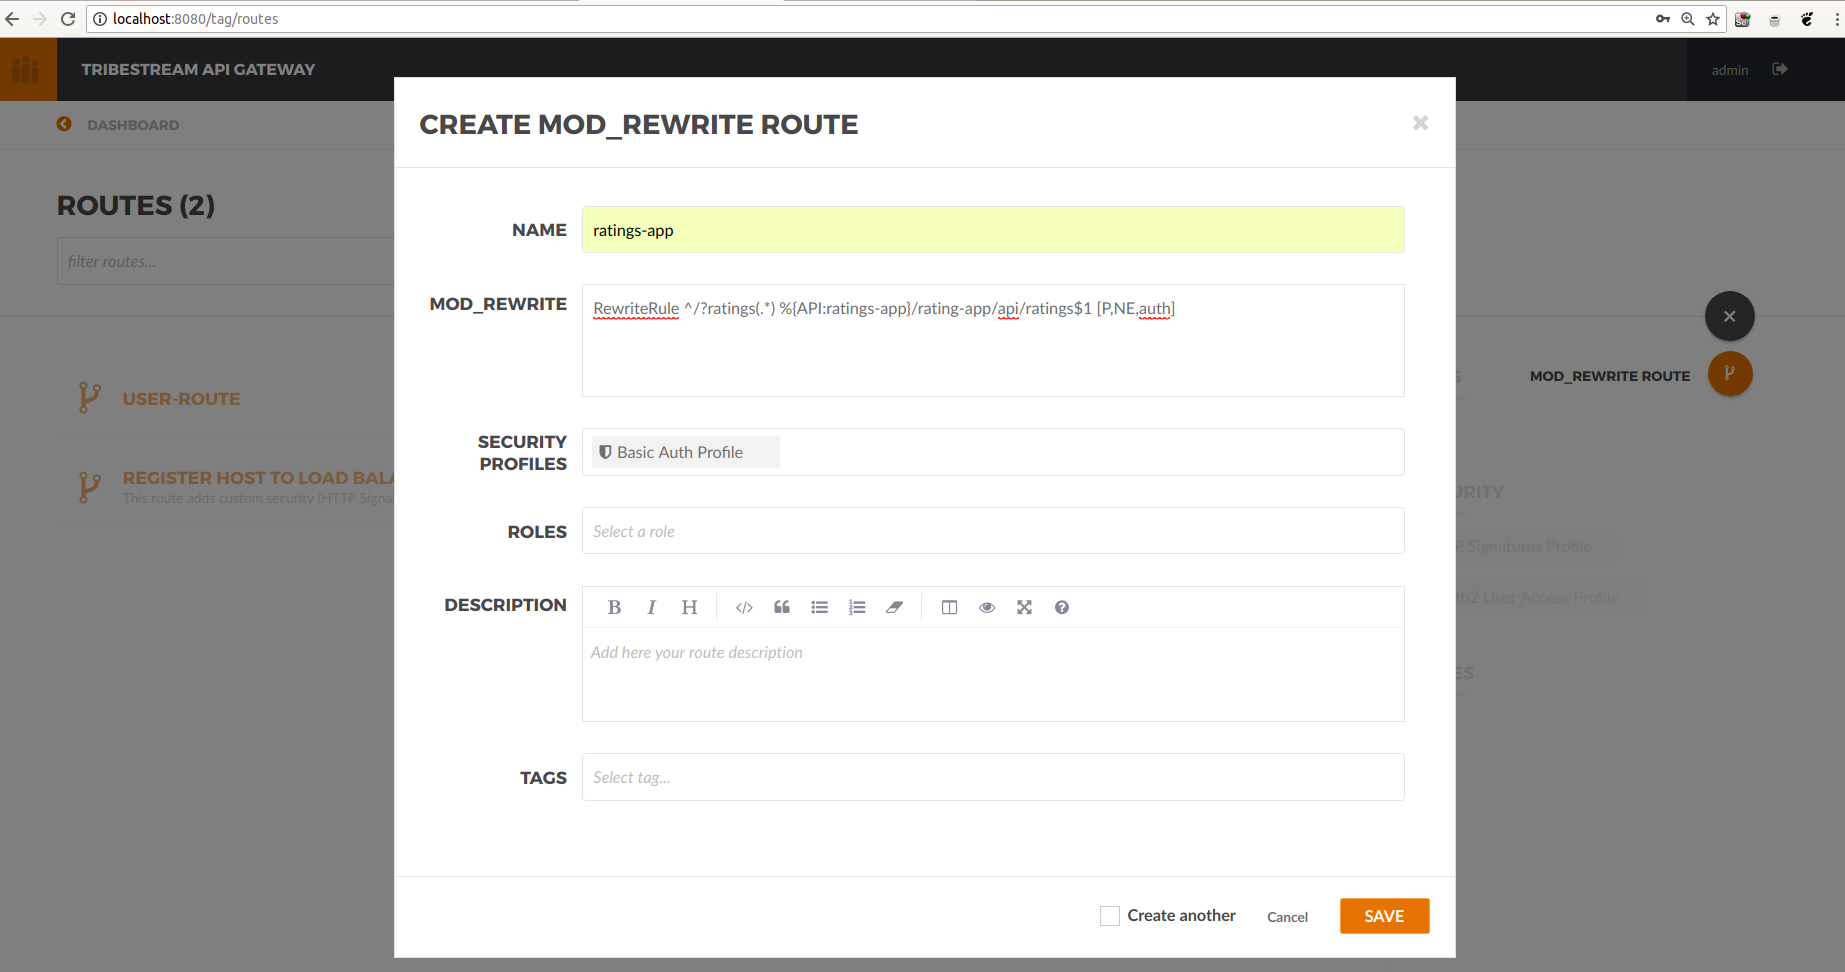
Add the name and the following rule:
RewriteRule ^/?ratings(.*) %{API:ratings-app}/rating-app/api/ratings$1 [P,NE,auth]Where %{API:ratings-app}auth
We’ve already added the movie cliente account, we just need to add a client secret to it.
User accounts use passwords, software applications use client secrets.
On the Dashboard, click Accounts and on the Movie Client Access client Account:
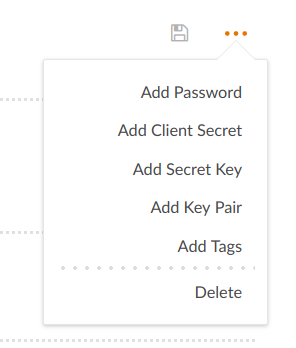
The modal will popup:
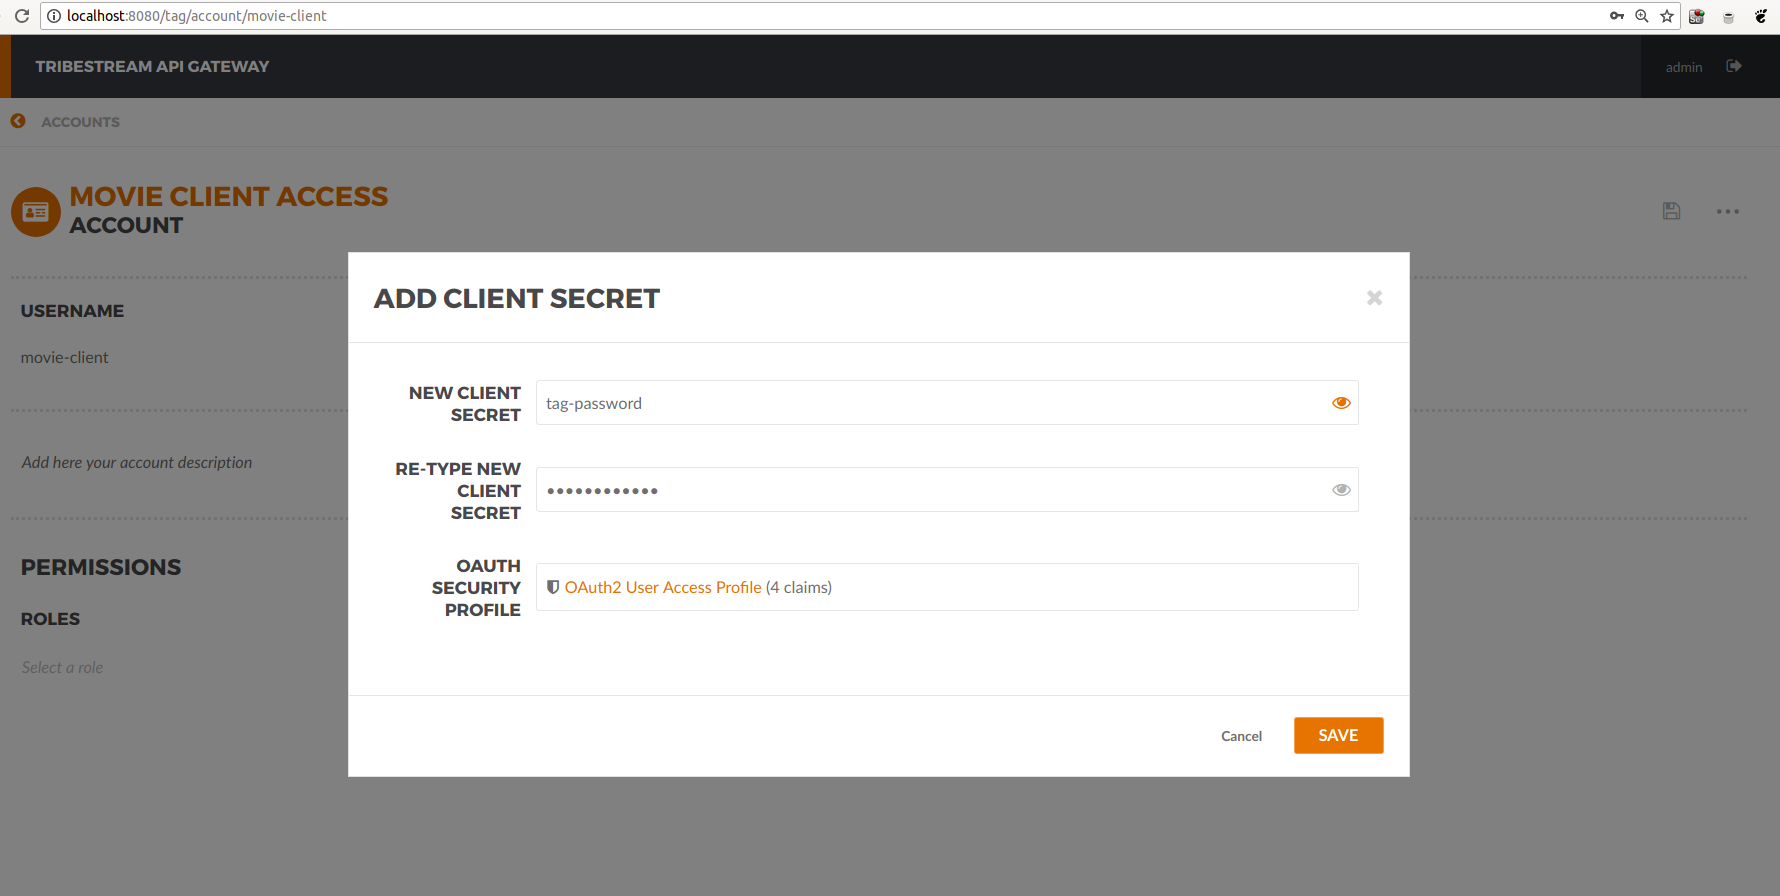
We could also use OAuth 2.0 authentication. That capability if on, but we will not use it in this guide. Save it.
Let’s simulate a user request by using the routes test window. Go to the Dashboard and select Routes. From the list click on the user-route. On the menu, click Test:
We use the Resource URL: /movie/movies
When we click test we can see the 200 OK and the movies list shown in the payload section at the bottom.
Since both the TAG and the microservice were created with a specific container name, you can now stop both containers, from the command line execute the following command.
Stopping TAG:OAuth 2.0
docker stop tagStopping the movie backend microservice:
docker stop movie-backStopping the ratings app microservice:
docker stop ratings-app