
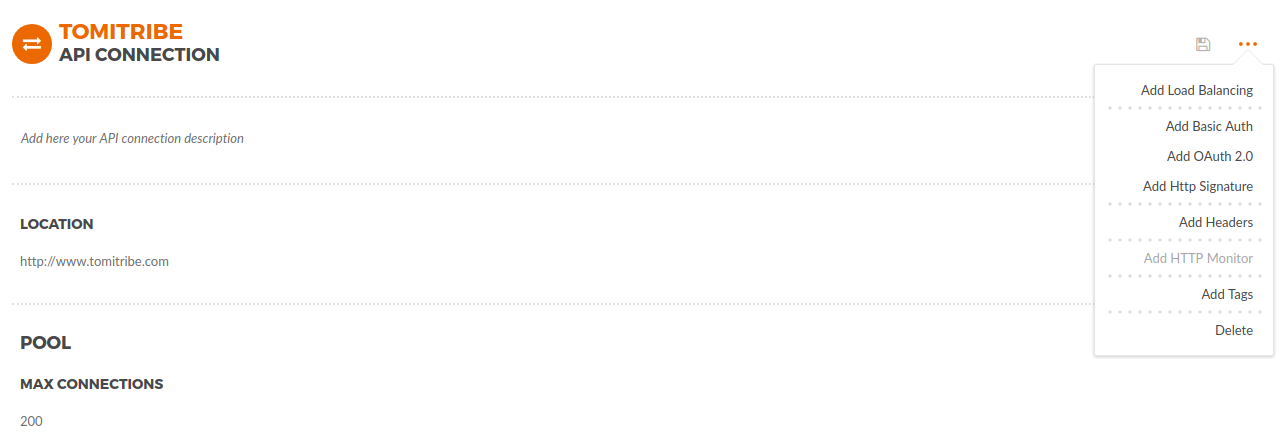
The API Connection simplifies API management as it provides a way to configure in a single place important things like Load Balancing, Http Monitor, Security among other things.
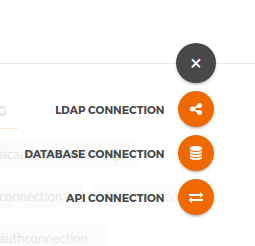
Create a new API connection in the menu Connections → plus button + → API Connection.
You will need to fill at least the basic required information which is Name and Location.
| Property | Description |
|---|---|
Name |
This is how you will identify the API Connection across TAG. E.g Google. |
Location |
This is a URL pointing to the API Location you want to integrate into TAG. E.g https://google.com. |
| In the location field paths are not allowed. Thus, locations like http://google.com/service1 are not valid. Paths must be configured directly where the API Connection is being used, which is whether Routes or the Claim Sources. |
After saving the basic required information the system will be redirected to the details page which the other detailed configuration like Load Balancing, Http Monitor, Security, Headers can be provided.
The Load Balancing feature provides a distribution of workloads across multiple locations.
To add load balancing capabilities to your API Connection, click ellipsis … → Add Load Balancing, the section below will be added to the page.
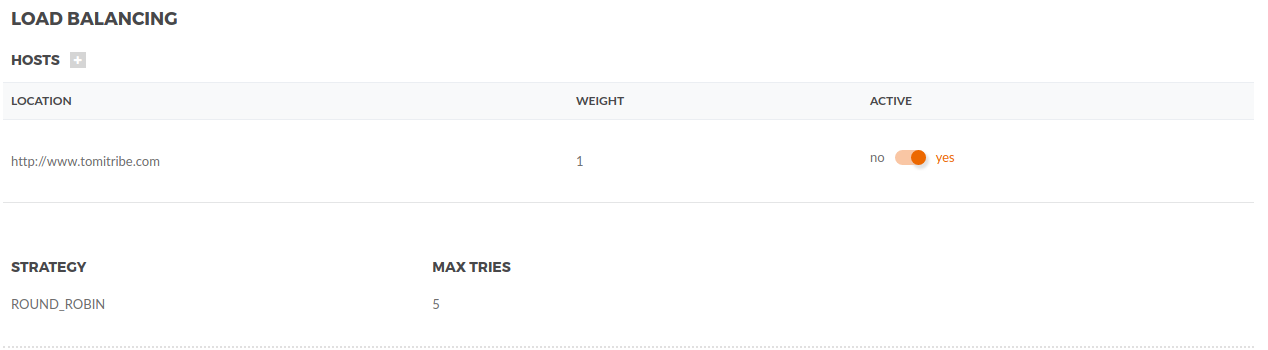
Multiple hosts should be added, so TAG can distribute the load between them. Click plus button + next to Hosts and fill the following fields:
| Property | Description |
|---|---|
Location |
URL that will be included in the Load Balancing. E.g. http://<host>:<port>; |
Weight |
The load distribution will occur based on the weight proportion, the locations with higher weight will be in front of the queue more often. |
Active |
A location can be set to active or inactive. |
Other configurations are:
| Property | Description |
|---|---|
Strategy |
We only support |
Max Tries |
The number of times TAG will try to connect. |
The Http Monitor is a health check that will be monitoring Hosts from time to time, to verify whether they are available or not.
To add Http Monitor capabilities you first must configure the Load Balancing. Then click ellipsis … → Add Http Monitor, the section below will be added to the page and Health and Last Seen will be added to the hosts.
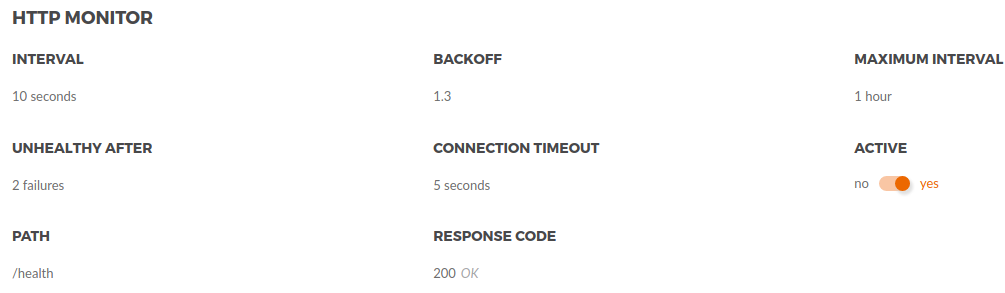
Configure the Http Monitor with your preferences. See the list of properties below:
| Property | Description |
|---|---|
Interval |
Initial time span between checks. |
Backoff |
The backoff base multiplier. When errors happen, we use exponential backoff to increase the time of the next check according to the following formula: |
Maximum interval |
The maximum interval for the exponential backoff. When errors happen, the interval between check will keep increasing until it reaches the Max Interval. |
Unhealthy After |
Number of failures for the host to be considered unhealthy. |
Connection Timeout |
Defines how long the monitor should wait a response. |
Active |
It defines if the monitor is active or not. |
Path |
The path that should be tested by the monitor. |
Response Code |
The HTTP response code the monitor expects to consider the host healthy. |
Check Security Profiles to understand the concepts of Security Profiles. In this section we will learn how to use the security profiles inside an API Connection.
To be able to authenticate in the APIs that we configure, we need to setup the authentication configuration. These configurations are done using the security profiles.
There are three types of security profiles you can choose Basic, OAuth2 and Http Signature and they can be added simultaneously.
Add a Basic security profile clicking ellipsis … → Add Basic Auth. The section below will be added to the page.

Configure the Basic Auth with your information. See the list of properties below:
| Property | Description | Type |
|---|---|---|
Username |
The username to authenticate. |
Required |
Password |
The password to authenticate. |
Required |
Prefix |
The prefix used in the Authorization header, default is |
Optional |
Add a OAuth2 security profile clicking ellipsis … → Add OAuth2. The section below will be added to the page.

Configure the OAuth2 with your information. See the list of properties below:
| Property | Description | Type |
|---|---|---|
Token Endpoint |
The endpoint TAG will use to get the access token. |
Required |
Grant Type |
The grant type that will be used to authenticate. |
Required |
Username |
The username to authenticate. |
Required |
Password |
The password to authenticate. |
Required |
Client ID |
The Client ID to authenticate. |
Optional |
Client Secret |
The Client Secret to authenticate. |
Optional |
Prefix |
The prefix used in the Authorization header, default is |
Optional |
Add a Http Signature security profile clicking ellipsis … → Add Http Signature. The section below will be added to the page.
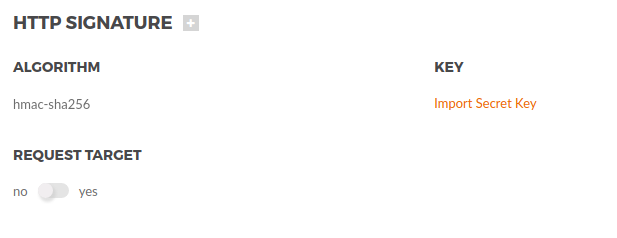
Configure the Http Signature with your information. See the list of properties below:
| Property | Description | Type |
|---|---|---|
Algorithm |
The algorithm to sign the request. |
Required |
Key |
The secret key to sign the request. |
Required |
Request-Target |
This is the URL called in the request. |
Optional |
Prefix |
The prefix used in the Authorization header, default is |
Optional |
An API Connection can add or update HTTP headers as part of the outbound request.

Each header will have an Action, see the description of the actions below:
| Action | Description |
|---|---|
ADD |
This will add a new header. |
SET |
This will update an existent header. |
Each header will have a Provider, see the description for the providers below:
| Provider | Description |
|---|---|
Default |
This is the default provider, it is used to send plain values. |
Date |
A date will be automatically computed by the server add to the request. |
Digest |
The digest will be automatically computed and added to the request. |
ENV |
It is used to add environment variable to the request. E.g Add |
OGNL |
Tt is an expression language for getting and setting properties of Java object. See OGNL Website for more details. |
The pool is a configuration used by TAG in the AsyncHttpClient.
| Property | Description |
|---|---|
Max Connections |
The maximum number of connections an AsyncHttpClient can handle. |
| Property | Description |
|---|---|
Accept Any Certificates |
It will accept self-signed certificates if this is active. (Self-signed certificates are not recommended.) |
Enabled Protocols |
SSL protocols allowed. |
Enable Cipher Suites |
Supported Cipher Suites. |
The timeouts are configurations used by TAG in the AsyncHttpClient to make calls to the hosts of an API Connection.
| Property | Description |
|---|---|
Request |
The maximum time, in millisecond, the client waits until the response is completed. |
Read |
The maximum time, in millisecond, the client can stay idle while reading an open socket. |
Connection |
The maximum time, in millisecond, the client can wait when connecting to a remote host. |
Tags can be added to an API connection and will help fast filtering while executing searches in the TAG.
In the Load Balancing chapter, we have seen that it’s possible to configure a load balancer for an API Connection. Adding a host to the load balancer host group using the UI is pretty simple. See Load Balancing chapter for more options.
One may want the process to be more elastic so the load balancer can grow or shrink down depending on the load. The API Gateway allows for self service registration. This makes it possible for a backend micro service to boot up and to register itself into the load balancer host group so it can start receiving traffic from the API Gateway.
Using the API Gateway routing capabilities, it is possible to use any of the supported authentication mechanisms in the API Gateway to secure the process. In addition to the authentication, it is also possible to enforce roles so a host cannot register to a wrong load balancer host group.
This chapter will detail all the required steps to register a host into a load balancer.
Create an API Connection with the name google with https://google.com for the endpoint.

Create a role for the API Connection so you can identify which user is supposed to add or remove hosts from a API Connection load balancer (google here).

Create a user joe with password secretsecret that has the role google

The next step is to create a security profile to authenticate a user. For now, we will use the built in Basic Profile.
By default the API Gateway comes with a route named REGISTER HOST TO LOAD BALANCER.
It is pre-configured with the default HTTP Signatures Profile.
It will automatically check the user trying to register a host to an API Connection has a role with the name of the API Connection.
To make it easier to test using CURL command line tool, we will replace the HTTP Signatures Profile and use Basic Profile instead.

| This default route is suitable for securing many load balancer host groups if you use the same naming conventions. Another option is to create a different route if you need custom behavior or security. |
Now, let’s imagine we want to add the host https://google.fr to the load balancer host group for the API Connection google.
curl -v -X POST -H "Content-Type: application/json" -H "Accept: application/json" --user joe:secretsecret \
  "http://localhost:8080/api/http/google/hosts/register" \
  -d "{
    "endpoint":"https://google.fr",
    "active":true,
    "weight":1
  }"
In order to use the REST API to administrate the API Connections, the user needs to have the admin role, or
a more specific role for API Connections only api_api-connection.
|