
Ldap Claim Source is used to add LDAP as a source of claims in TAG. Claims are anything you want to store into a JSon Web Token (JWT), it can be a telephone number, a home address or anything you stored in the LDAP and want it to be in your token.
Before configuring a LDAP Claim Source you will need to have a LDAP Connection. The connection will be used to access and authenticate to LDAP.
| Configuration | Description |
|---|---|
Connection |
Ldap connection to be used as the source of accounts. |
| Configuration | Description |
|---|---|
Base DN (Distinguished Name) |
The Base DN is the starting point in the hierarchy at which your user claims search will begin. e.g ou=people,ou=system |
Filter |
Search filters enable you to define search criteria for finding user claims. {username} is the variable that will be replaced at runtime with the username logged in. The uid is the LDAP username attribute containing the username data. For example: (&(objectclass=person)(uid={username})) |
Subtree Search |
If true the search will be done in the subtree as well. |
Let’s say you as a System Administrator want all the users that get a JWT, to receive within the token their phone-number that is stored in LDAP.
To be able to do that we need to configure a LDAP Claim Source that will search for a user in LDAP and that user will have the homePhone.
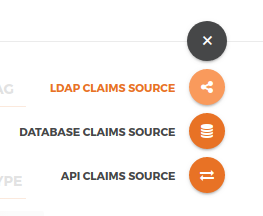
In the Dashboard page go to Claims Sources then click LDAP CLAIMS SOURCE:
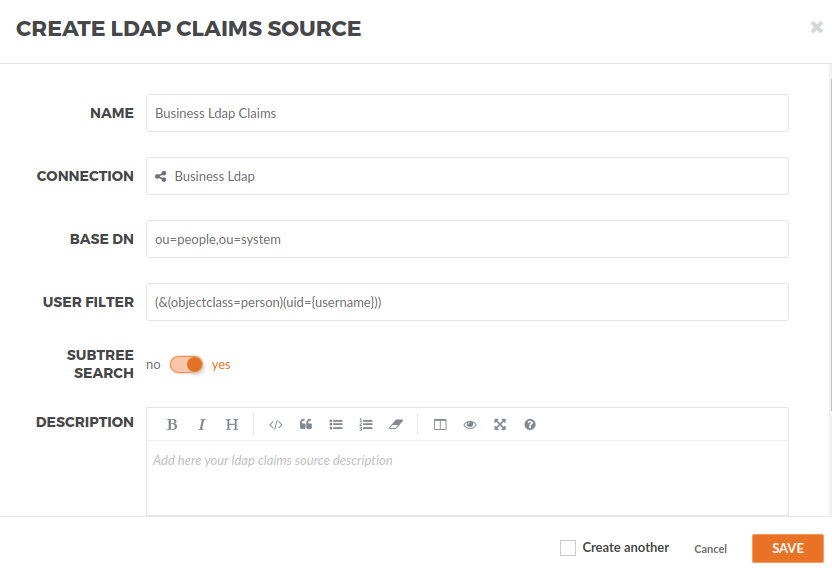
Create a new LDAP Claim Source with following information:
Field |
Value |
Description |
Base DN |
ou=people,ou=system |
This will be the distinguished name where users are stored in LDAP and where the search with start. |
Filter |
(&(objectclass=person)(uid={username})) |
The search will filter an LDAP object called person in the Base DN directory, and look for a user with the attribute uid equal to {username}, however {username} is a parameter replaced at runtime by the user requesting the token. |
Subtree Search |
Enabled |
This will try to apply the filter we wrote in all sub directories. |
The configuration should stay like this:
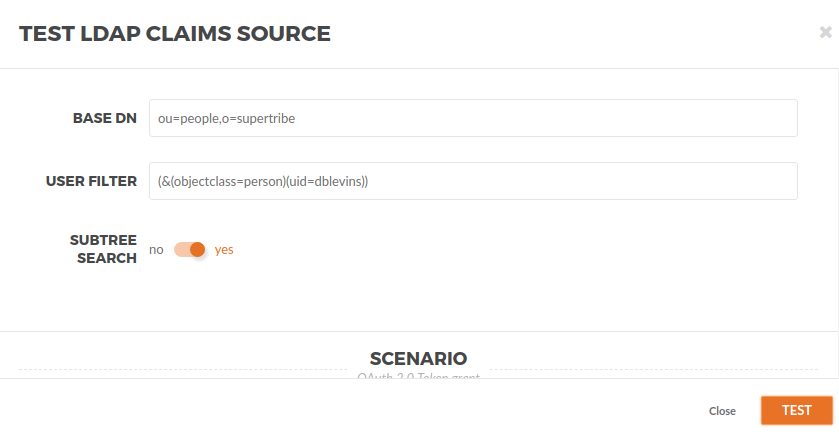
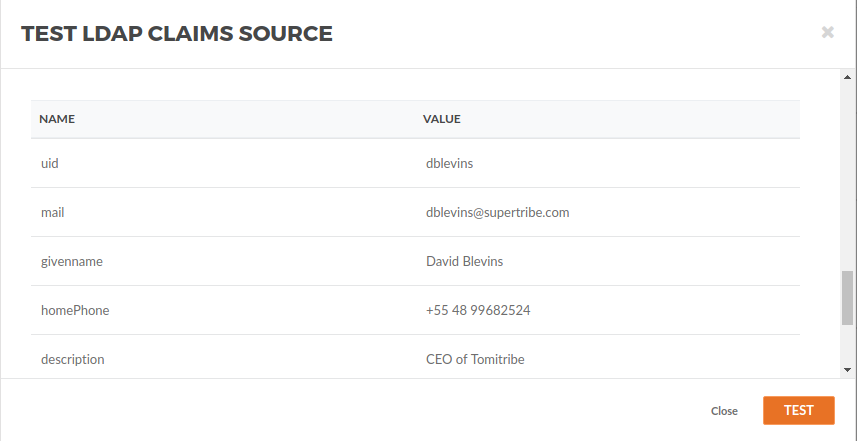
In the right top click in the … → Test, then configure the test window like the image below. For testing purposes replace {username} with the username you want to get the Claims. For this example is dblevins.
You will be able to see the logs for the test.
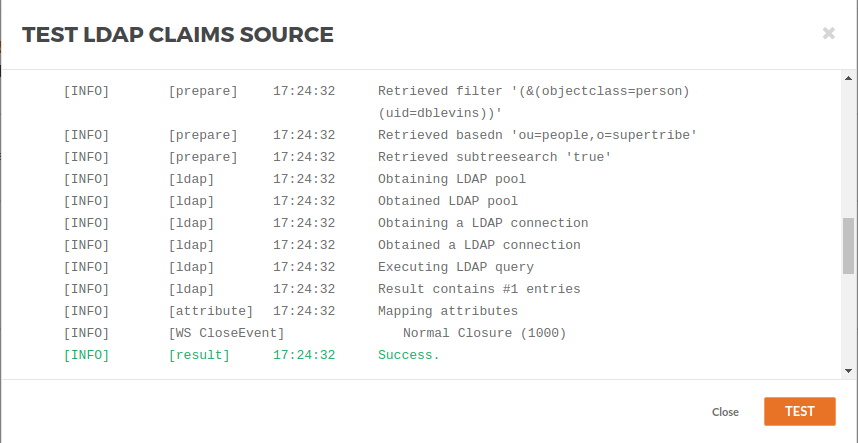
And the claims will show as the result of the test.
Don’t forget to add back {username} to your filter so it can be used at runtime with the user getting the token.
After making sure your LDAP Claim Source is working you need to tie it to the OAuth2 Profile you are using. So go back to the Dashboard then go select the default OAuth2 Security profile.

Add the Claim from LDAP that you want in the JWT.
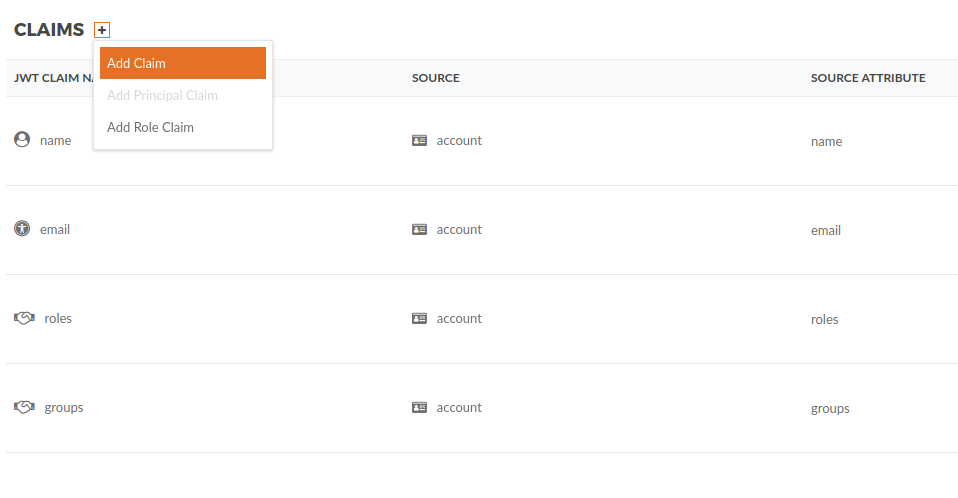
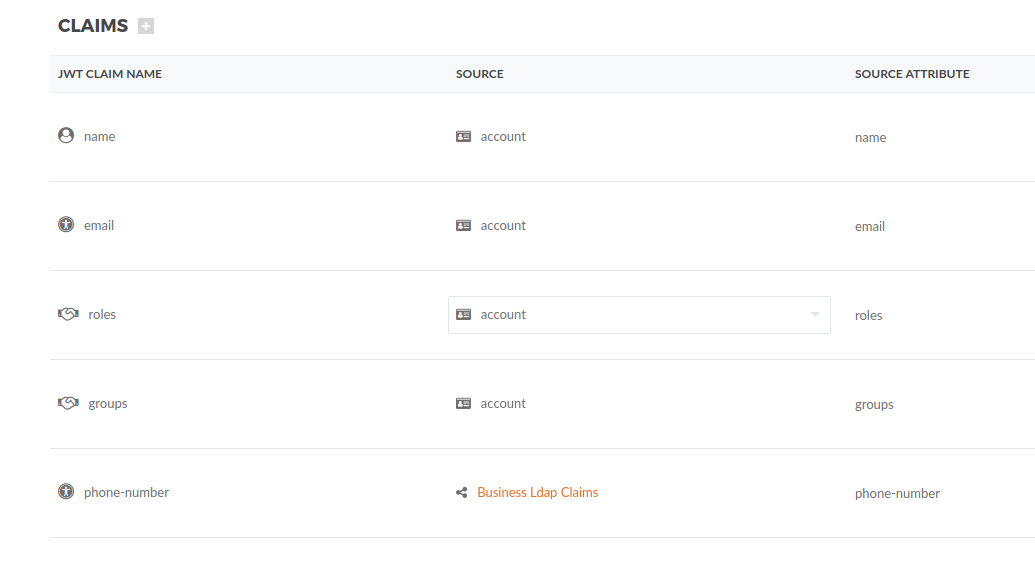
Then add the JWT Claim Name as phone-number pointing to Business Ldap Claims as you configured, with the Source Attribute Name homePhone.
To test this, just request a token and the phone-number should be there.
{
  "phone-number": "+55 48 99682524",
  "token-type": "access-token",
  "nbf": 1548444410,
  "roles": [],
  "iss": "/oauth2/token",
  "groups": [],
  "tag-internal": {
    "grant-type": "password",
    "profile": "OAuth2 Profile",
    "version": "1.0",
    "username": "dblevins"
  },
  "exp": 1548446210,
  "iat": 1548444410,
  "jti": "486b5fd0cb0a8b93"
}